Studio Basics 1.0
Murf Studio helps you create realistic sounding AI voice overs for your projects in a matter of minutes. It is super easy-to-use and runs right in your browser. It features a large collection of 120+ AI voices in 20+ languages and includes rich customization features like pronunciation, emphasis, pause, pitch, and speed control. Here are a few basics that will get you familiar with the different sections of the Studio.
Studio Nomenclature
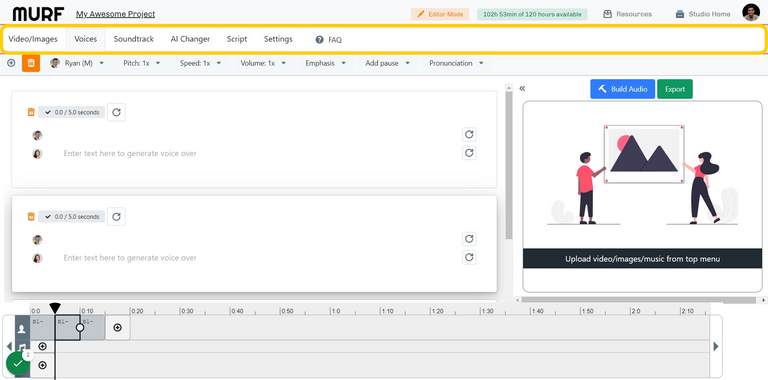
1. Top Menu
The top menu contains the following tabs:
- Video/Image tab: Upload and edit images or videos
- Voices tab: Voices selection and settings
- Soundtrack tab: Upload and edit soundtracks
- AI Changer tab: Upload and Convert to AI Voice
- Script tab: Upload text files
- Setting tab: Project settings
- FAQ: Redirect to the FAQ page
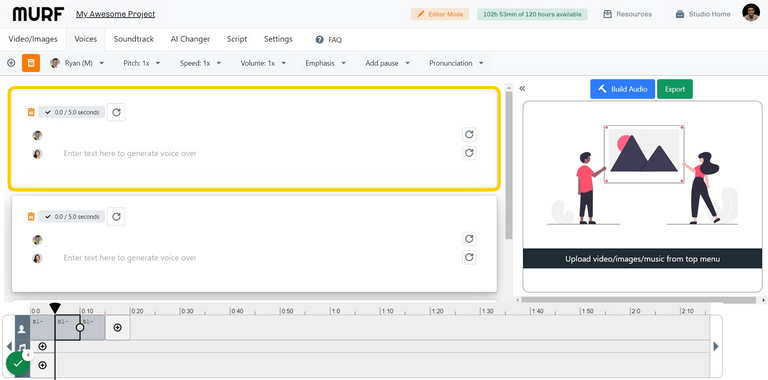
2. Block
- Blocks represent paragraphs
- There is no limit to the number of blocks you can add to a single project
- Every block created will also show in the bottom timeline as a voice block
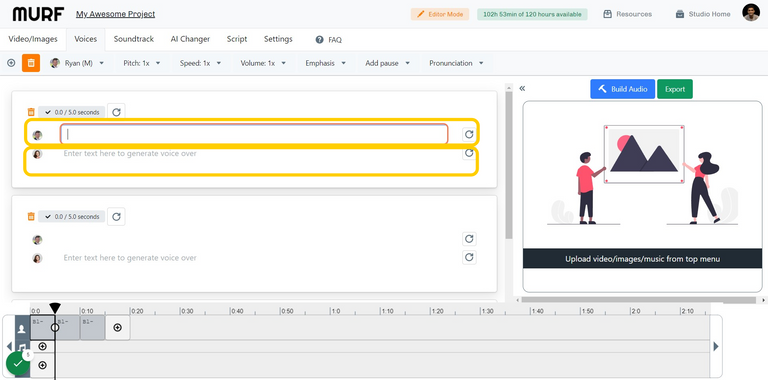
3. Sub-block
- Sub-blocks represent sentences
- There is no limit to the number of sub-blocks you can add to a block
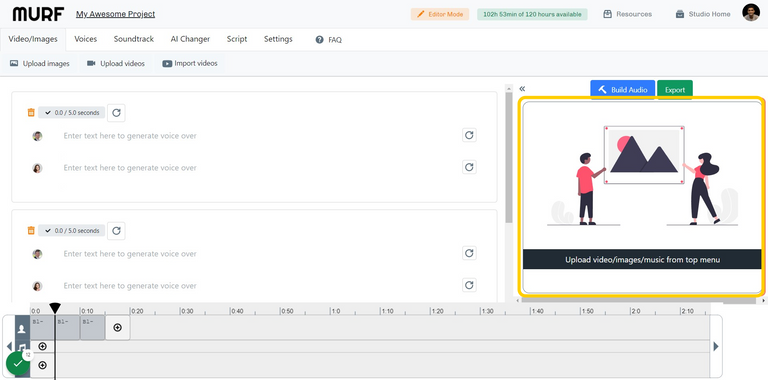
4. Preview Panel
- View your last built project
- Every time you use the Build Audio/Video button the changes will be reflected in this panel
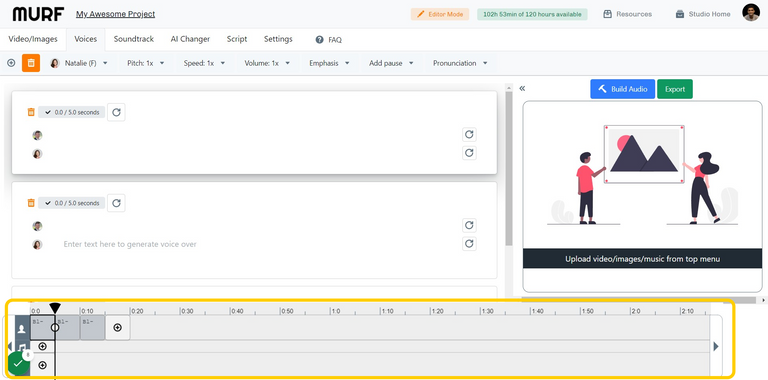
5. Bottom Timeline
The bottom timeline is split into 3 parts:
- Voices: Every Block created in the project can be found in the timeline as a Voice Block
- Audio: Any audio file uploaded and/or audio from a video will be found in the timeline as an Audio Block
- Image/Video: Images and videos added to a project can be found in the timeline as Image and Video Blocks
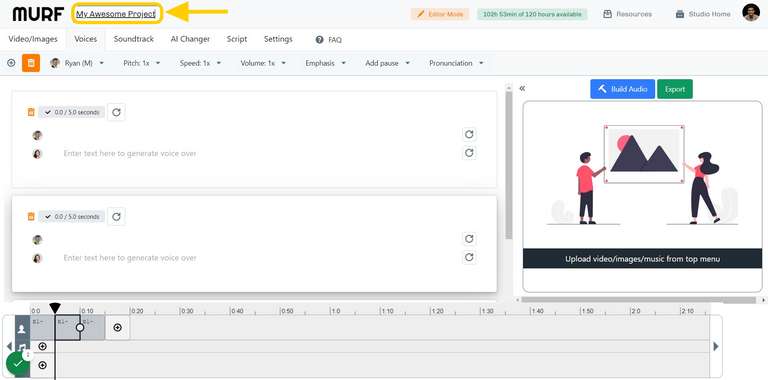
6. Project Name
- The project name can be edited from here at any time.
- The same will be reflected in the Studio Home Page
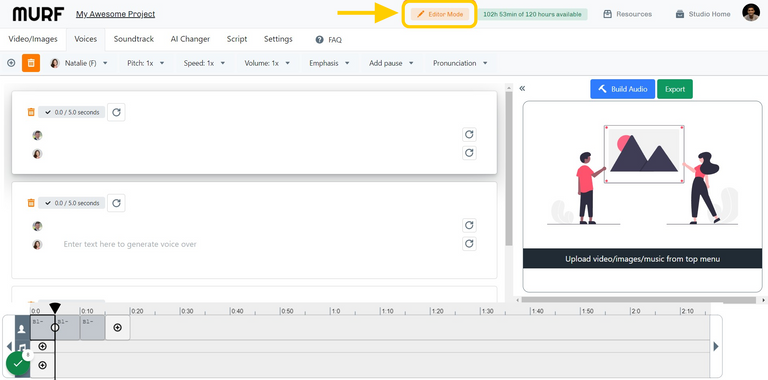
7. Project Permission Status
There are 2 different statuses available for a project:
- Read Mode
- Can only view the project
- Cannot make changes or download the project
- Edit Mode
- Can make edits and download the project
Project Edit access can be taken from the same tab.
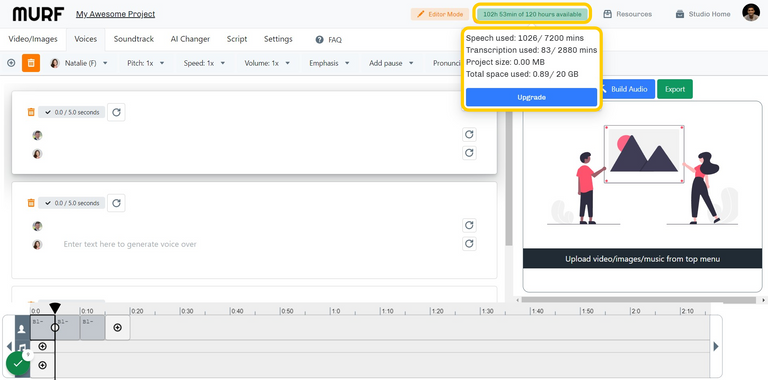
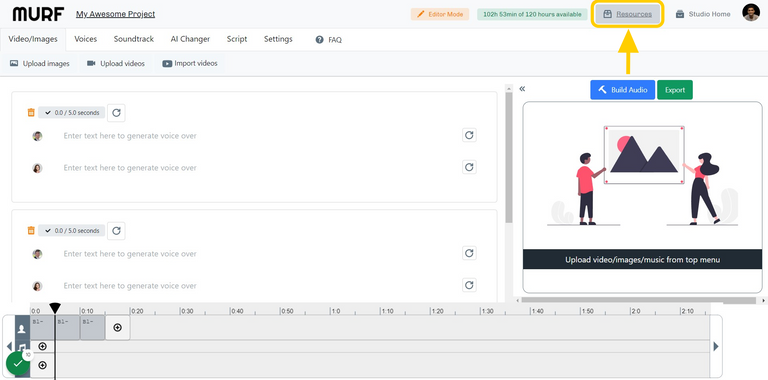
8. Account Usage
You can track the following account usage stats here:
- Speech Used (VGT): Voice generation time is calculated as the sum of generated speech length of every text block. It is consumed every time you render a newly created text block or modify text in an existing text block.
- This is irrespective of whether you downloaded the file or not.
- Modifying the generated speech using a different Voice actor, Style, Pitch, Speed, Pause, Emphasis, Pronunciation, Punctuation, and Volume for the same text will not consume any voice generation time.
- Transcription Used: Transcription time is calculated based on the duration of the audio file being transcribed.
- Project Size: Your current project size includes, the text and any media files uploaded.
- Total Space Used: Total account storage based on all projects created. Each plan has a fixed storage limit. More information can be found on the pricing page.
10. Studio Home
This will take you back to the Studio Home page where all projects and workspaces are present.
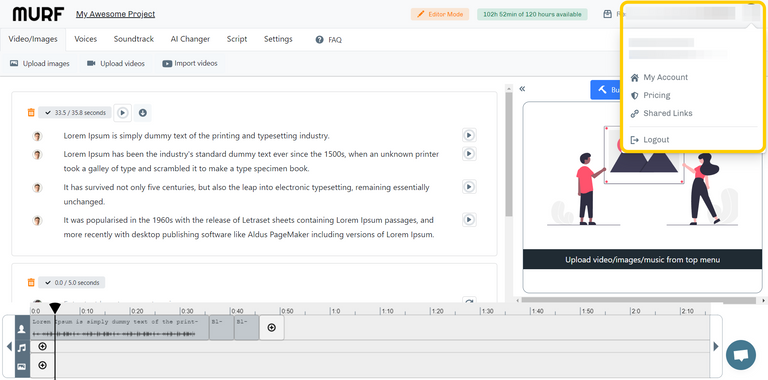
11. Account Menu
- Account Display Name
- Account Signed In ID
- My Account: Redirect to Profile Settings Page
- Pricing: Redirect to Pricing Page
- Shared Links: Redirect to Shared Links page to manage previously shared links
- Logout
Working with a Block
Topics covered
- Generate/Play
- Download
- Add/Delete
- Rearrange
1. Generate/Play
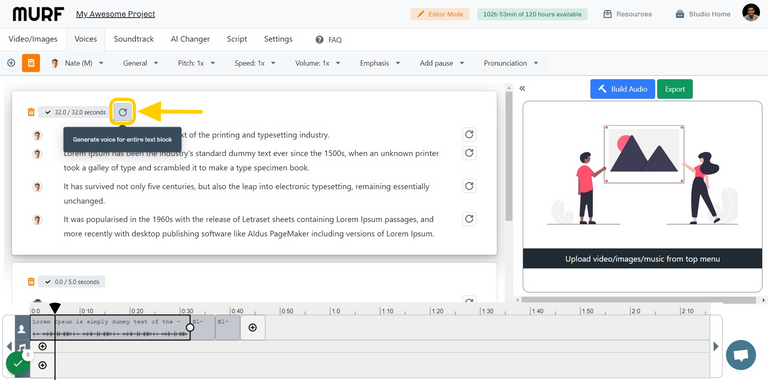
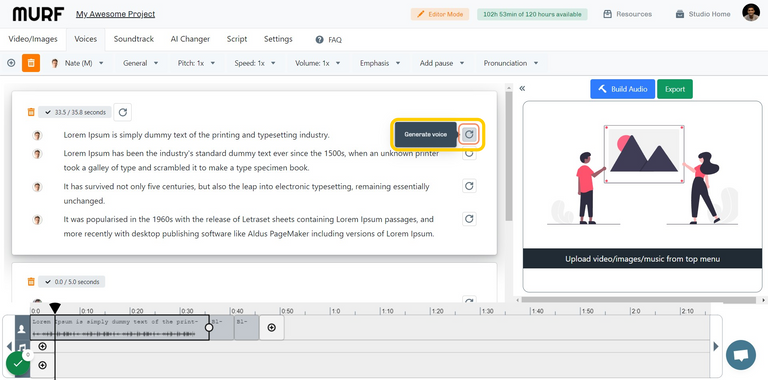
- You can use the generated button present at the block level to convert the text to speech for the entire block at one go.
Play
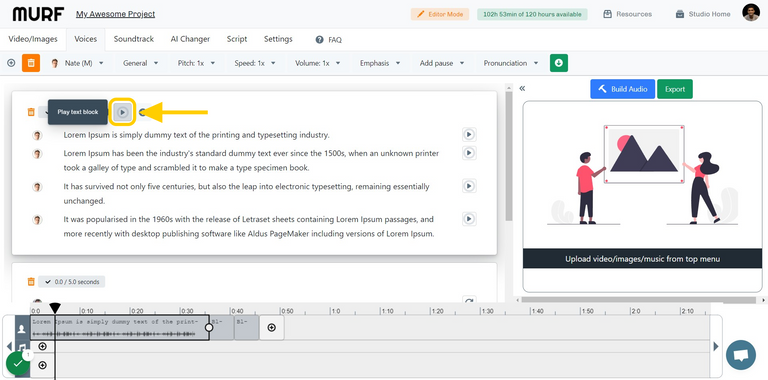
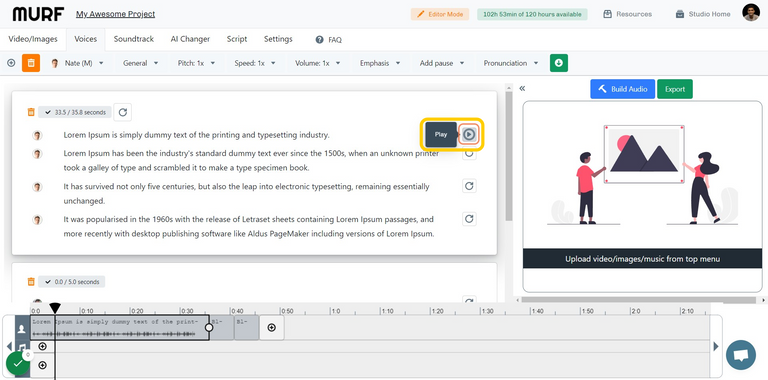
- Once your block has been generated, the generate button will become a play button.
- This will play all the sub-blocks present in the block in sequence.
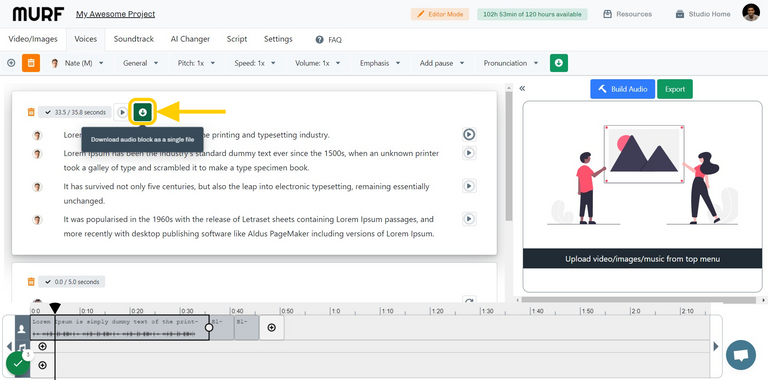
2. Download
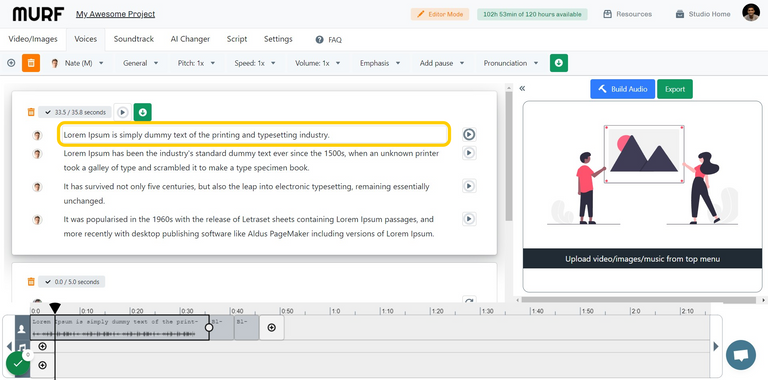
- You can use the Download button present next to the play button to download that block as an individual mp3 file.
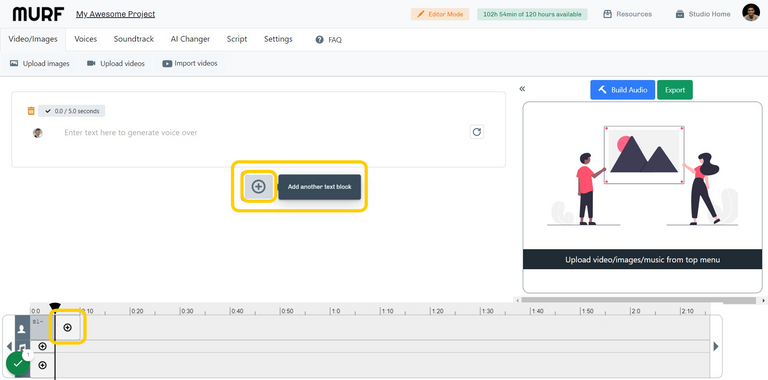
3. Add/Delete
- You can add a new block by using the '+' button present below the last block
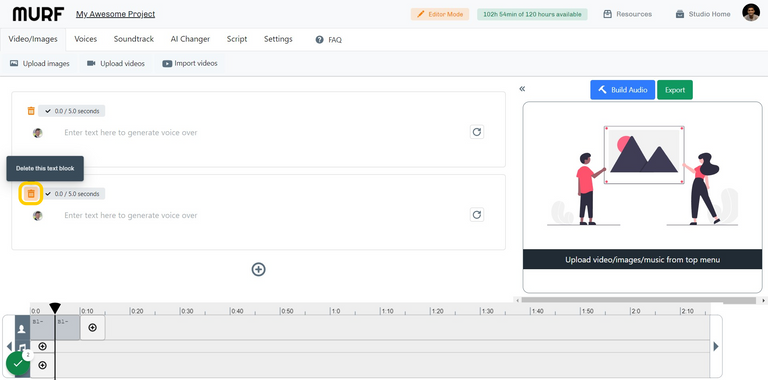
Delete
- The delete button present within the Block is used to delete the Block
- You can also right-click the block from the bottom timeline to delete the block
- You will be prompted with a confirmation screen upon deleting a sub-block
- Deleting blocks can't be undone
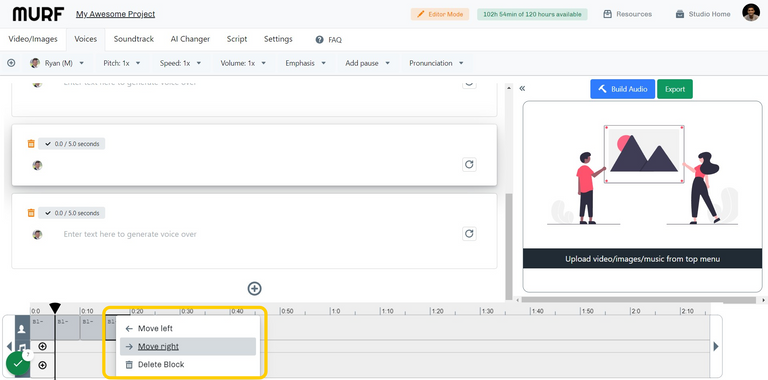
4. Rearrange/Move
- To rearrange/move a block kindly select the block from the bottom timeline and right-click to view the move option
- Blocks can be moved one place to the right or to the left
- You can also delete a block from here
Working with a Sub-block
Topics covered
- Generate/Play
- Download
- Add/Delete
1. Generate/Play
- You can use the generate button present at an individual sub-block/sentence level to generate the text to speech.
Play
- Once your sub-block/sentence has been generated, the generate button will turn into a play button.
- This play button will play the audio for that sub-block only.
2. Download
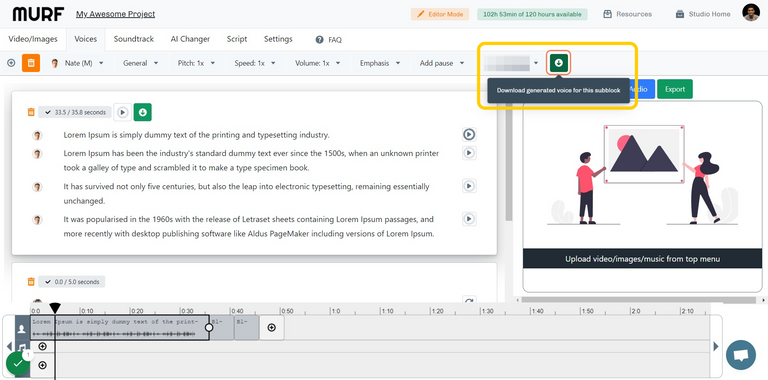
- Select the sub-block you wish to download
Download (Step 2)
- You can use the Download button present in the top menu to download that sub-block as an individual mp3 file.
3. Add/Delete
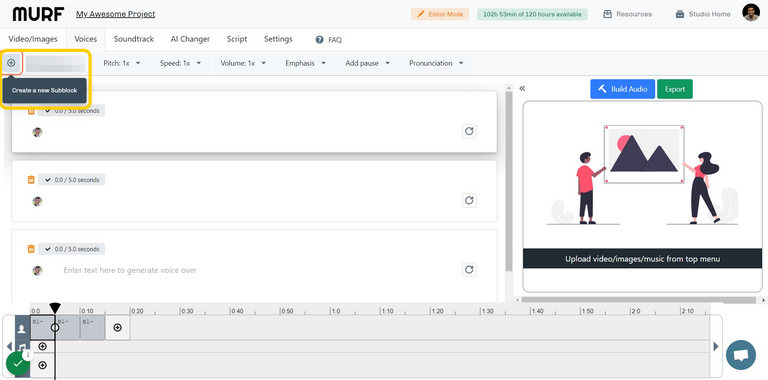
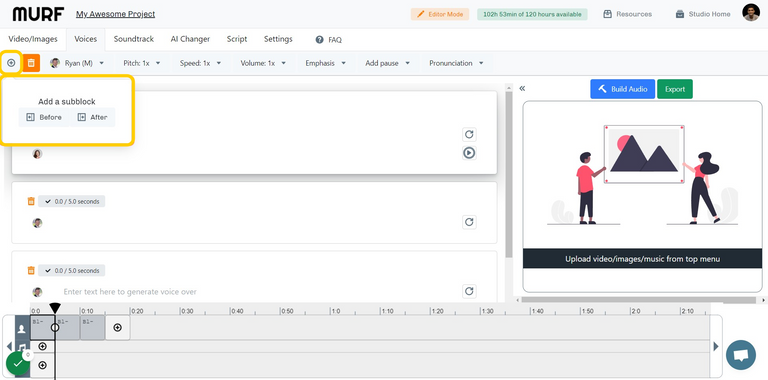
- Click on the '+' sign present in the top menu to add a sub-block to the block
Add: Before or After
- After: Sub-block will be added after the selected sub-block
- Before: Sub-block will be added before the selected sub-block
Delete
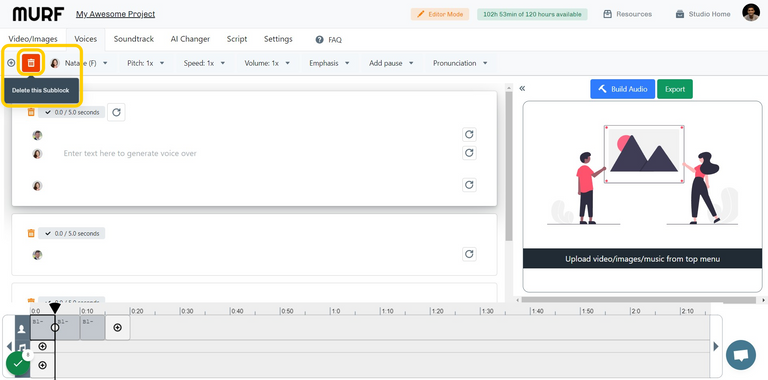
- Select the sub-block you wish to delete
- A delete icon will appear in the top menu under the Voices tab
- You will be prompted with a confirmation screen upon deleting a sub-block
- Deleting sub-blocks can't be undone
