📂Imports & Exports
IMPORTS
Images
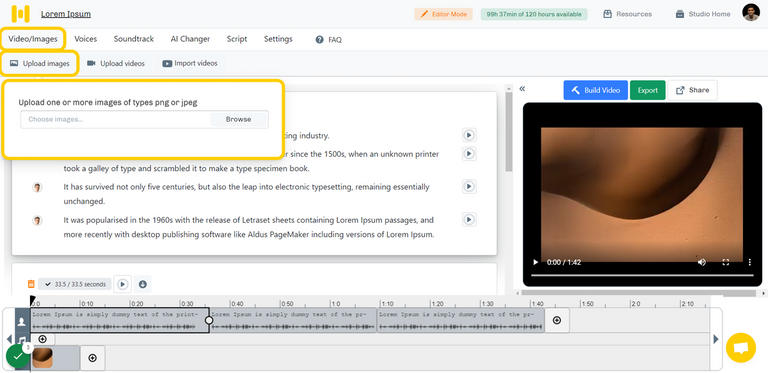
Users can add images to their projects by uplaoding them to the Studio.
- The studio only supports PNG and JPEG image formats.
Upload image
- Create a new project in the studio.
- Click on the Video/images option located on the top menubar.
- A popup will appear, giving you an option to browse and upload images saved on your desktop or computer.
Videos
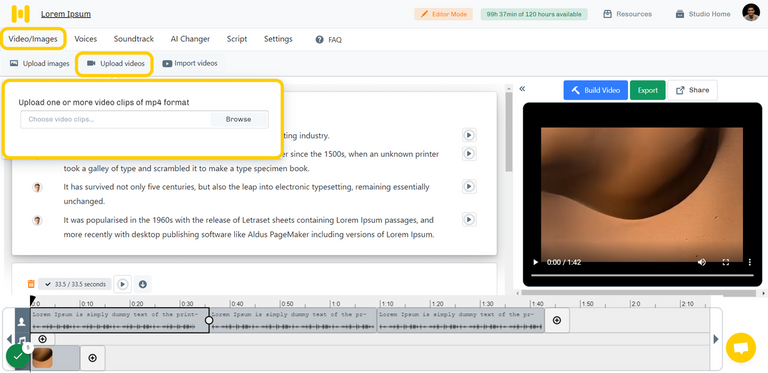
- This option lets you add background videos to the project by uploading them to the studio.
- The studio only supports MP4 video formats.
Upload Video:
- Create a new project in the studio.
- Click on the Video/images option located on the top menubar.
- A popup will appear, giving you an option to browse and upload videos saved on your desktop or computer.
Note: If you wish to upload multiple Images/Videos from your computer, press and hold the "Shift" button on your keyboard to select multiple images and then click on "Open." The project will be updated with all of the chosen images and videos. This is compatible with both Windows and Mac.
Import Video
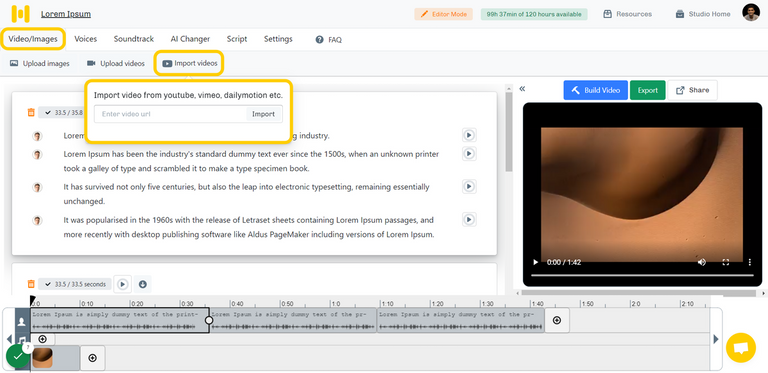
You can Import Videos and soundtracks from Youtube, Vimeo, Dailymotion, etc.
Steps to import the Video:
- Copy the link to the source video file and head back to the studio.
- Click "import video" under the "Video/images" option located in the top menu bar.
- Paste the source file URL in the following pop-up and click 'Import.' Now, the Video will be imported into the project and seen on the timeline.
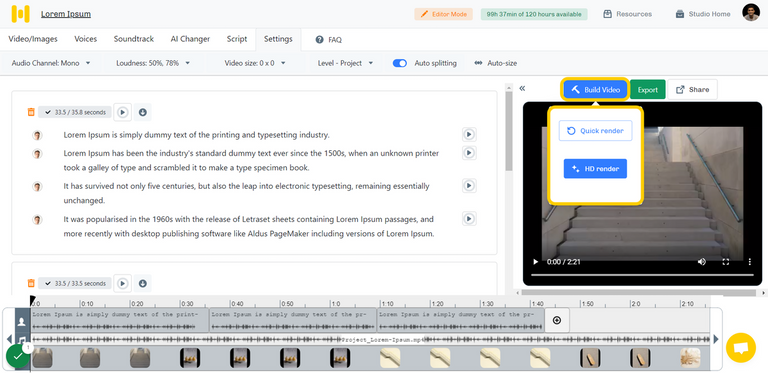
Render Options
Quick render
This option can show you a video preview quickly. The video quality will not be in HD and will have a quick render time.
HD render
To view the final preview of a file, click on the HD render option, which will show you the detailed preview as it appears after downloading the file.
Note: If you have rendered your video by clicking on "Quick Render," it will be downloaded in the same format. For final outputs, it is recommended to use the "Final HD Render" option and click on download.
Soundtracks
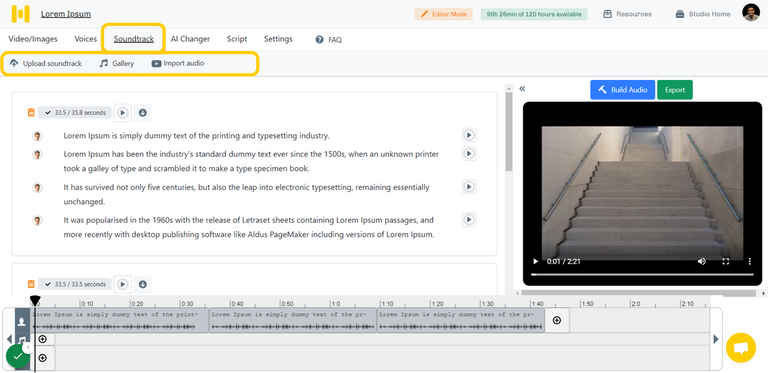
- This option lets you add background music or a voiceover to the project by uploading it to the studio.
- The studio supports only mp3 format as of now.
- The uploaded audio files can be seen on the bottom timeline.
Upload a soundtrack:
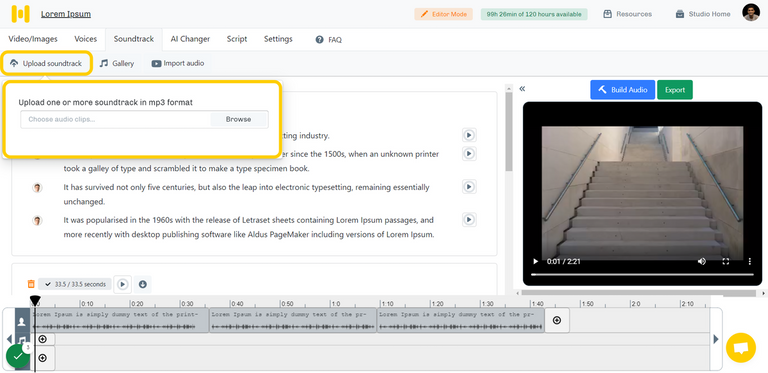
- Click 'Upload soundtrack' under the Soundtrack tab. A pop-up will appear, prompting you to upload an mp3 file.
- Browse through your computer and select the file and click open. The soundtrack will be uploaded to the project.
Gallery
- The studio has a library of royalty-free music that you can use as background music for the voice-over.
- There are 50 soundtracks and one empty soundtrack categorized based on their genre so that you can filter them to suit your content.
- The silence soundtrack can be used as a filer in different instances where speech is not being played.
- You can listen to the audio track before adding it to the project.
- The gallery also stores your previous uploads on other projects. You can access them from here and add them to the project.
Steps to add background music from Gallery:
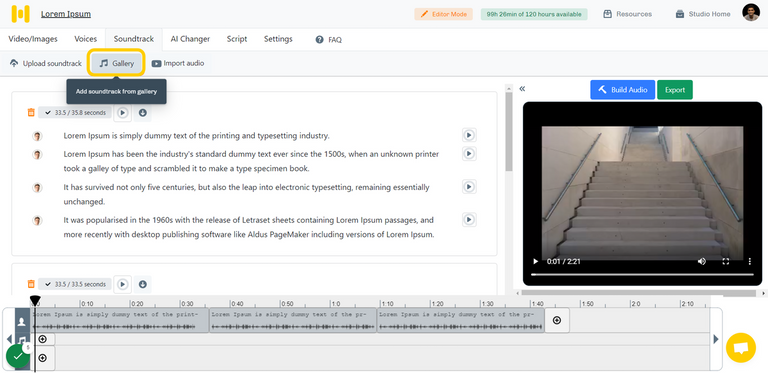
- Under the "Soundtrack" tab, click the' Gallery' button on the top toolbar.
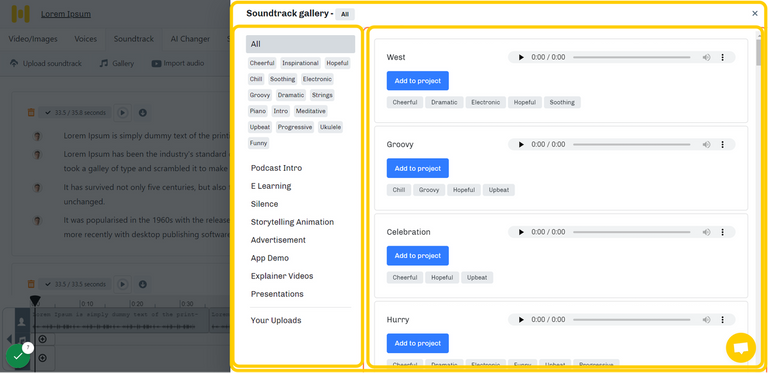
- A pop-up will appear from the right side of the screen. This is the Gallery.
- Filter the track by the genre and use case.
- Listen to the audio and add the one you like by clicking 'Add to project.' The selected audio track will be added to the project and can be seen on the bottom timeline.
- The Gallery also stores all the audio files you uploaded in your previous projects. You can add them from the Gallery by clicking on 'Your Uploads.'
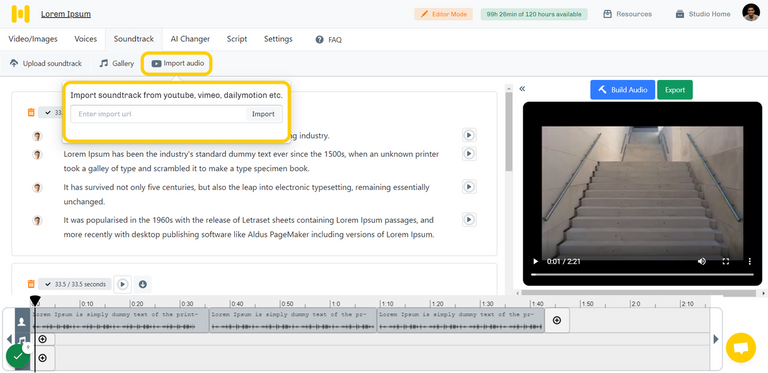
Importing audio
Audio files can be imported to your project with the help of the link to the source video.
Steps to import the Audio:
- Copy the source audio file link and head back to the studio.
- Click 'Import Audio' under the 'Soundtrack' tab.
- Paste the link in the following pop-up and click 'Import.' Now, the audio will be imported into the project and is seen on the timeline.
EXPORTS
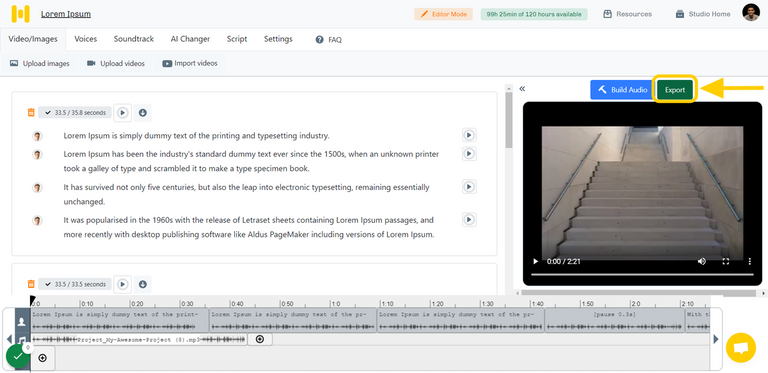
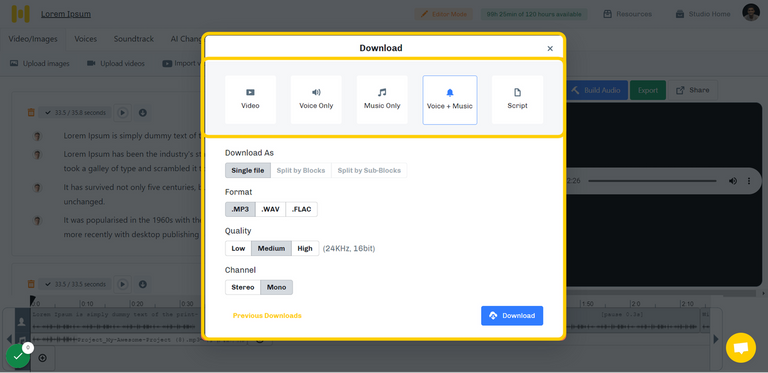
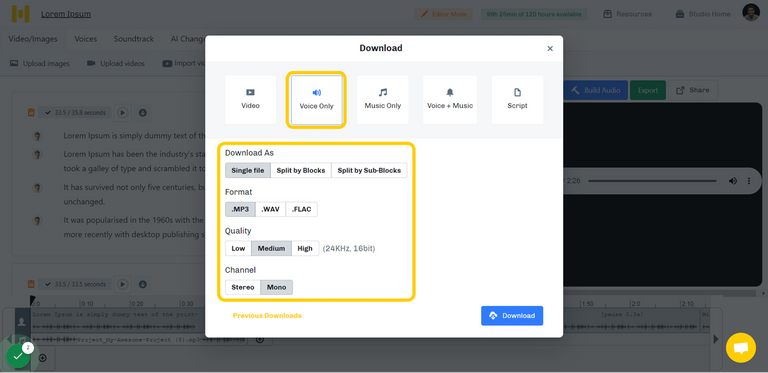
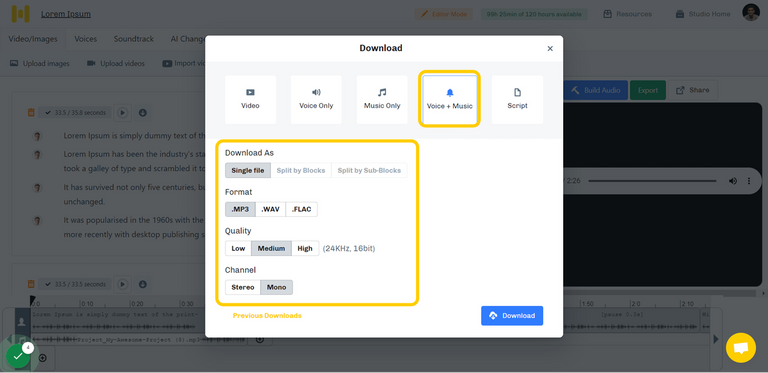
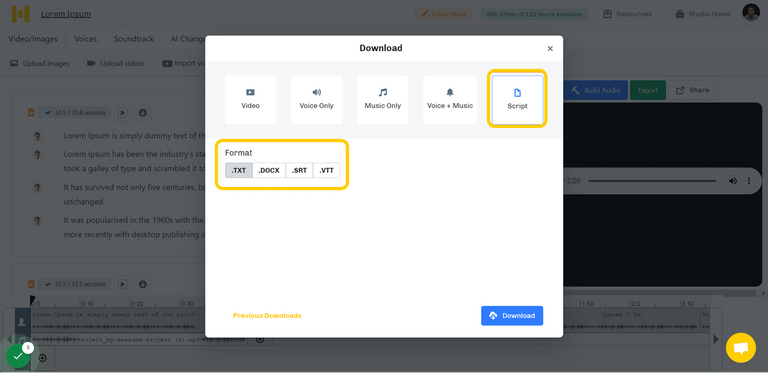
Export: This option helps you export and download the final file or the whole project in any format you want, like voice only, script, etc., as shown below.
You can download the content in the following formats:
- Video
- Voice only
- Voice + Music
- Script
Video
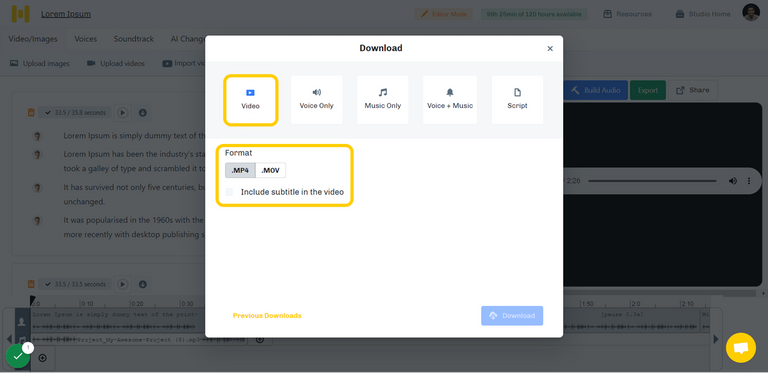
- You can download the video files in .MP4 and. MOV format.
- You can also add your script as subtitles in your downloaded video file.
Subtitles
- Murf studio gives you an option to add subtitles to your video. While downloading a video, you can tick the option "Include subtitles in the video."
NOTE: the subtitles are not embedded into the video and need to be enabled from your respective media player.
Kindly head to the subtitles menu in your respective media player to enable the subtitle file.
Voice only
- Murf studio gives you an option to extract voice from a fully-fledged project and download the voice-over file separately. The user has other filters like formats, quality, and many more. The user can select and download a file as per their requirements.
- Murf studio gives you an option to extract voice from a fully-fledged project and download the voice-over file separately. The user has other filters like formats, quality, and many more. The user can select and download a file as per their requirements.
Voice + Music
- Murf studio allows you to isolate the voiceover and the background music from a complete production and download the file separately. Other filters, such as formats, quality, and others, are available to the user. This allows the user to choose and download files according to their need
NOTE:
- The "Voices Only" option can be downloaded as a single file, block, and sub-blocks.
- "Music only" and "Music + voice" will only be downloaded as a single file.
Script
- The studio allows you an option to download a script of a project in many formats like TXT, DOCX, SRT, and VTT.
- TXT
- A TXT file is a standard text document that contains plain text. It can be opened and edited in any text-editing or word-processing program.
- .DOCX
- A DOCX file is a Microsoft Word document that typically contains the text. DOCX is the newer version of DOC.
- .SRT
- An SRT file is a plain-text file that contains critical information regarding subtitles.
- This includes your text's start and end timecodes to ensure your subtitles match your audio and the sequential number of subtitles.
- .VTT
- A VTT file is a text file. It contains supplementary information about a web video, including subtitles, captions, descriptions, etc. It does not have any video data.
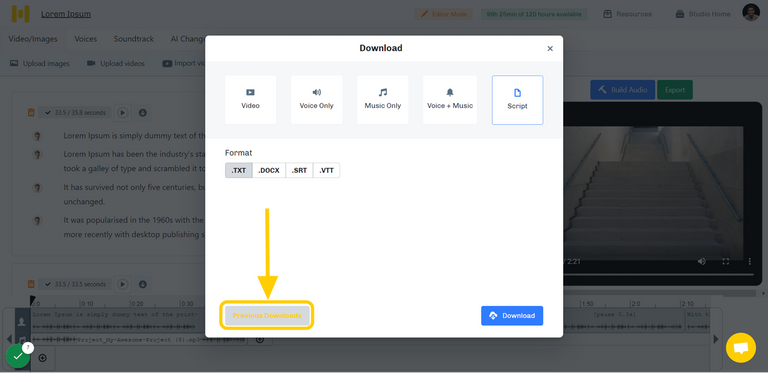
Download Manager
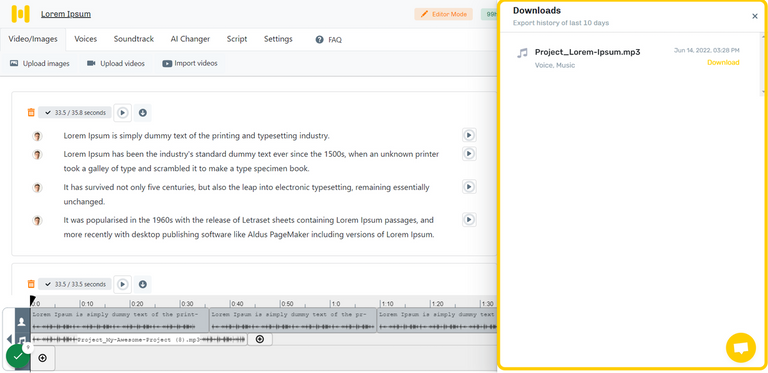
The studio also provides you with a facility to keep track of downloads made within the past ten days. Any downloads made before that will not be visible.
SHARE
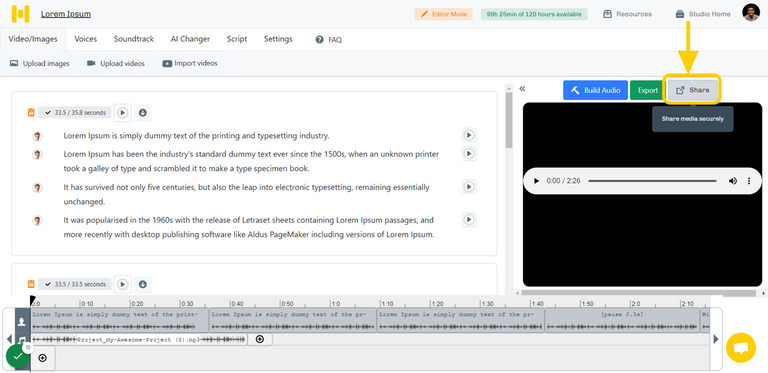
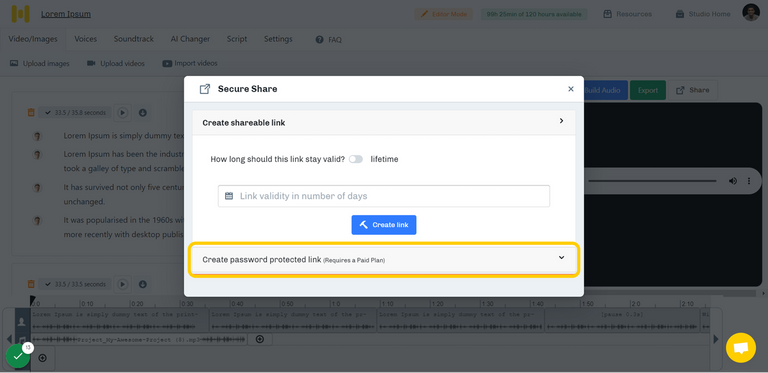
Creating a shareable link makes it simple to share your rendered Video by clicking on the "Share" button above the video pane on the Project Page.
Create a Shareable Link
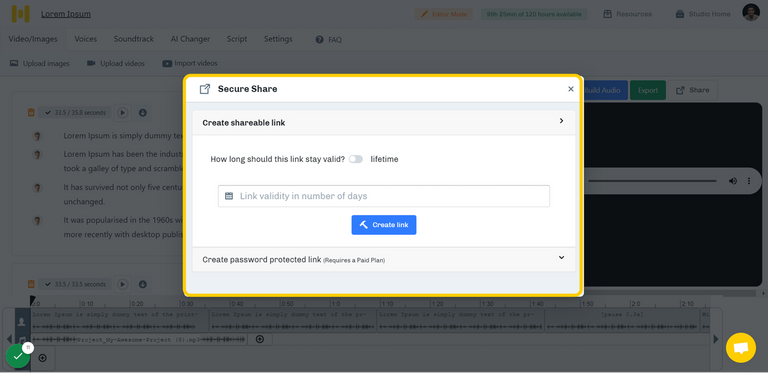
Creating a shareable link allows you to share Project videos with anyone (including people who don't even have a Murf account) via a unique URL
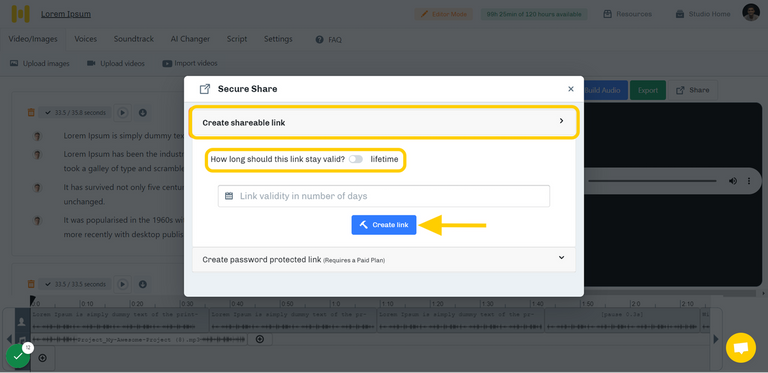
Shareable Links can be generated by deciding the validity of the link. These links expire as soon as the time mentioned (In Days) is completed. You can also create a connection with a lifetime validity by clicking on the lifetime toggle option.
For example, Suppose you have shared a link with a validity of 2 days. In that case, the URL will be automatically revoked after the said period has passed.
If you want to generate a link that does not expire, click on the toggle button beside "lifetime."
Then, click the 'Create link' button, and your shareable link will be created. You can then copy and paste this link anywhere.
Note: Shared links are dynamic in nature, meaning, when you make any changes to the original project and Build the project, the same changes will reflect in the shared link once it has been refreshed.
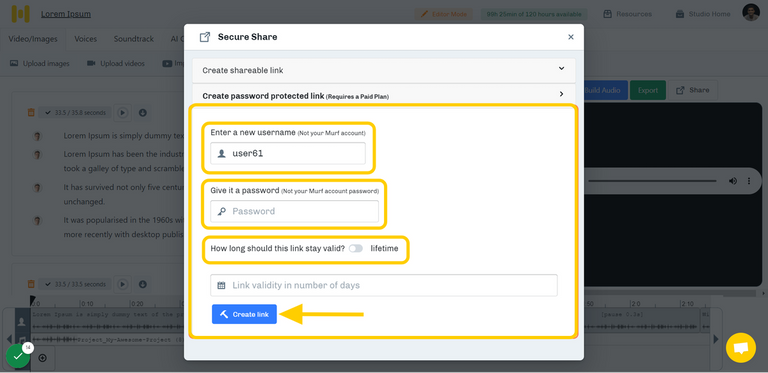
Create a Password Protected Link
Password-protected Shareable Link controls the access of shareable URL links. When you share the password-protected link, the user will have to enter the password to proceed to view the content.
You can set a username and password when creating a Password protected link and decide the validity of this secure link.
Note: Creating Password Protected links are only available with Basic Plan and above.
Delete a Shared Link
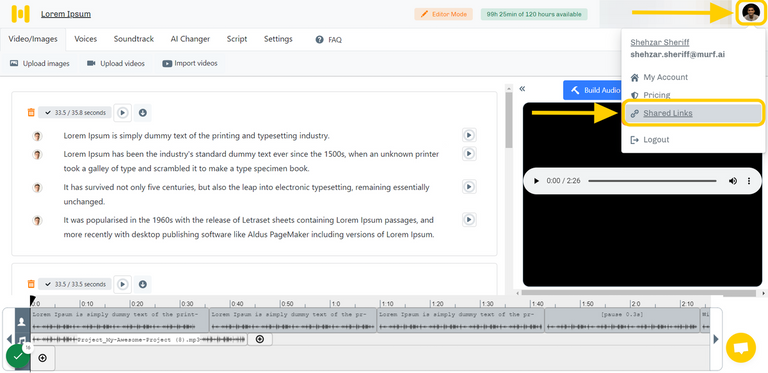
- Click on your profile badge located on the right-hand side of the project.
- Click on the option "Shared link."
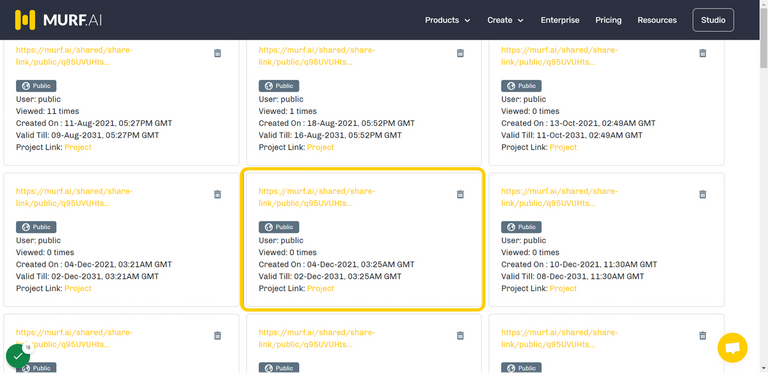
- A Pop-up with the list of shared links will appear.
- Click on the delete option on the right-hand side of any project tab to delete the shared link of that particular project.
