Soundtrack 1.0
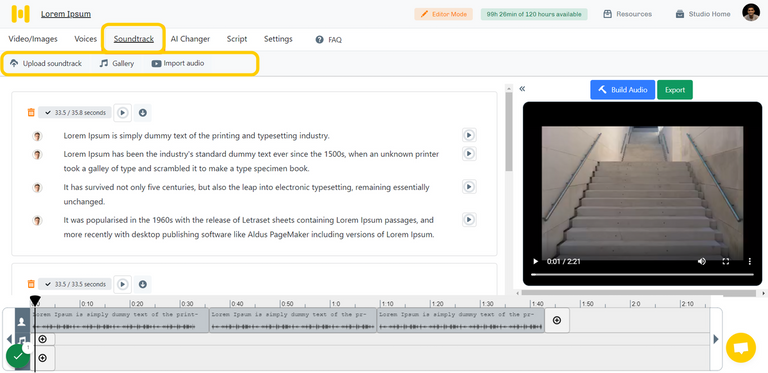
Having background music is one of the important ways to keep your audience focused on the content. Murf Studio lets you do the same. The 'Soundtrack' tab in the Studio lets you add music and/or a prerecorded voice over to your project. It also allows you to edit your recorded voice over audio as well.
There are 3 options available under the soundtrack tab:
- Upload soundtrack
- Gallery
- Import Audio
Note: unfortunately, our Studio is not equipped with live recording capabilities. Our team is working on implementing this feature.
Upload Soundtrack
- This option lets you add background music or a voice-over to the project by uploading it to the Studio.
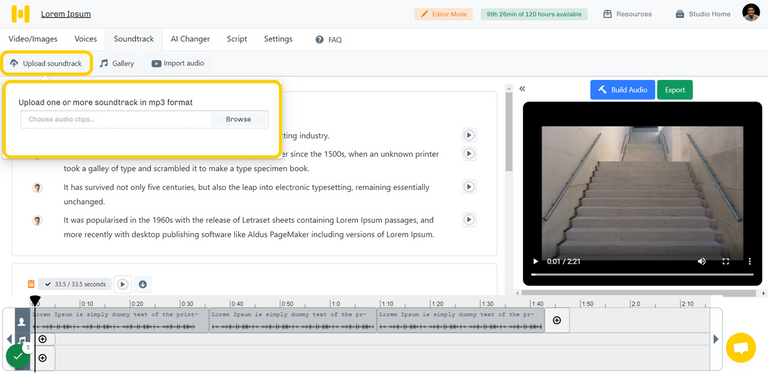
- The Studio supports only mp3 format as of now.
- The uploaded audio files can be seen on the bottom timeline.
- The following edits can be carried out to audio files:
- Trim
- Edit
- Delete
- Transcribe
How to upload a soundtrack?
- Click 'Upload soundtrack' under the Soundtrack tab. A pop-up will appear, prompting you to upload an mp3 file.
- Browse through your computer and select the file and click open. The soundtrack will be uploaded to the project.
Gallery
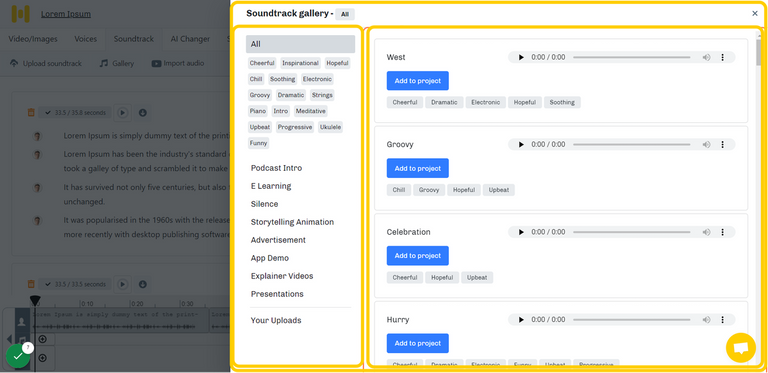
- The Studio has a library of royalty-free music that can be used as background music for the voice-over.
- There are 50 soundtracks and one Silence soundtrack categorized based on their genre so that you can filter them to suit your content.
- The silence soundtrack can be used as a filer in different instances where speech is not being played and/or background music is to be played froma specific timestamp.
- Audio tracks can be previewed before adding them to the project.
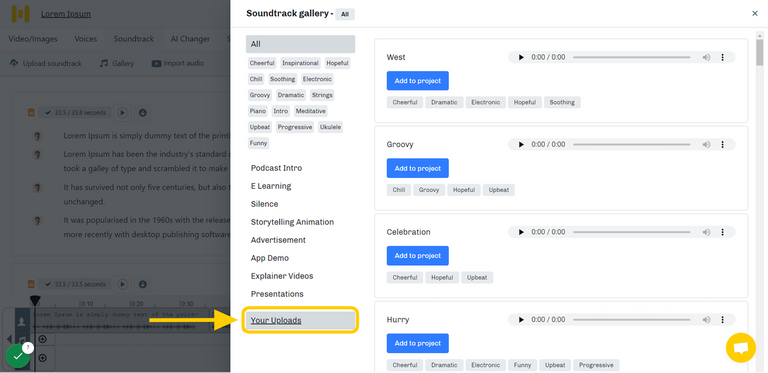
- The gallery also stores your previous uploads on other projects. These can be accessedfrom here and added them to the project.
How to add from Gallery?
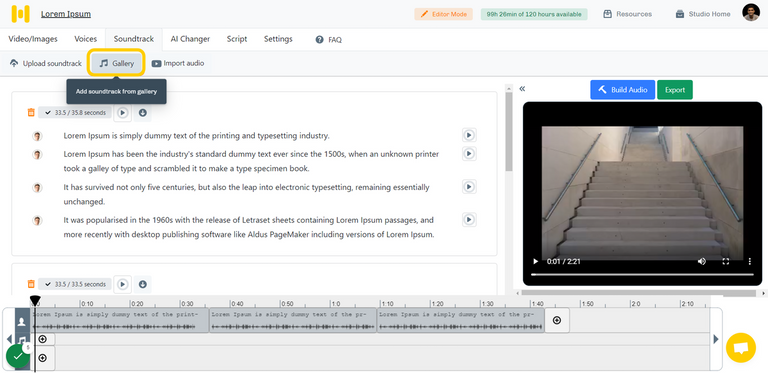
- Under the "Soundtrack" tab, click the' Gallery' button on the top toolbar.
- The Gallery will appear from the right side of the screen.
- Filter the track by the genre and use case.
- Listen to the audio and add it to the project by clicking 'Add to project.' The selected audio track will be added to the project and seen on the bottom timeline.
- The Gallery also stores all the audio files uploaded in previous projects. These can be added from the Gallery by clicking on 'Your Uploads.'
Import Soundtrack
Audio files can be imported to your project with the help of the link to the source video.
How to import the soundtrack?
- Copy the link to the source video and head back to the Studio.
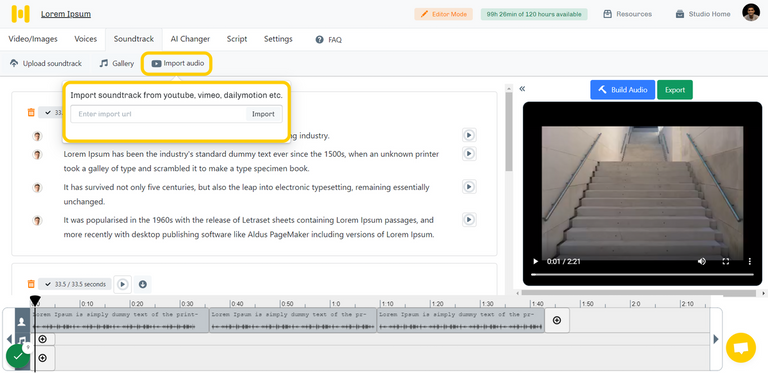
- Click 'Import Audio' under the 'Soundtrack' tab.
- Paste the link in the following pop-up and click 'Import.' Now, the audio will be imported into the project and seen on the timeline.
Transcribing Audio
Once the audio file has been uploaded , it can also transcribed (speech to text) into the Studio.
- The transcribe feature can be done under the 'Voices' tab on the top toolbar.
- The audio can be edited by editing the text once it is transcribed.
- The speech from the aduio track can be converted into any of the AI voices present in the Studio.
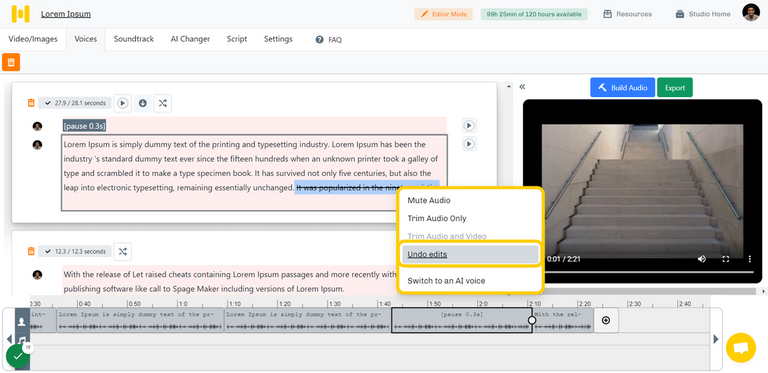
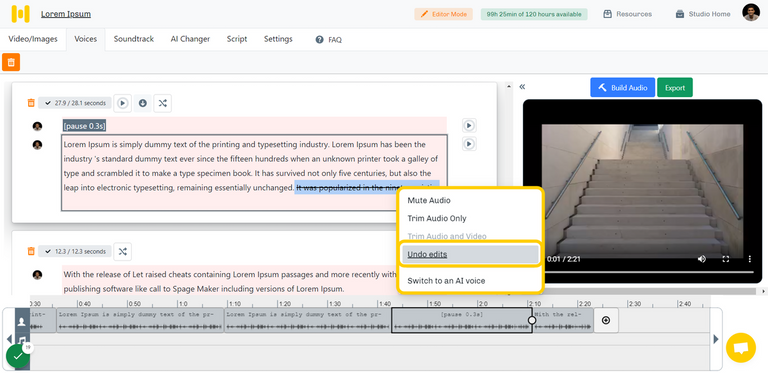
- Once the audio is transcribed into a written script, the user can make changes like muting or trimming some words or sentences in the script. The user can also undo the edits anytime.
- The Studio also has an option to convert a pre-recorded voice to an AI voice using the AI Changer feature.
Note - While choosing the language for transcription, the user should ensure that the language selected for transcription should be the same as the language spoken in the audio file. The Studio will convert the speech in the audio into its respective language.
How to transcribe?
- Upload the audio file in the Studio.
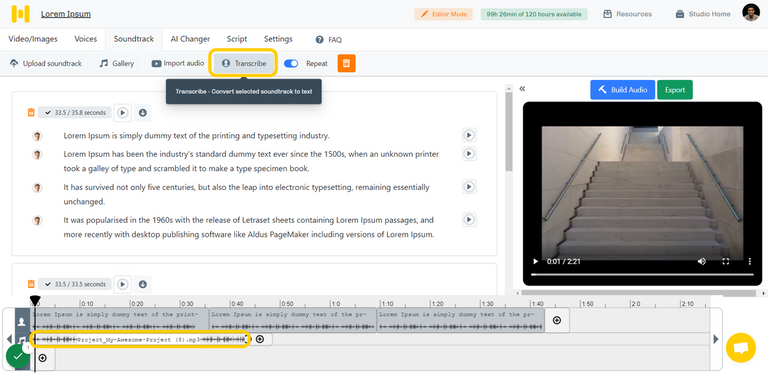
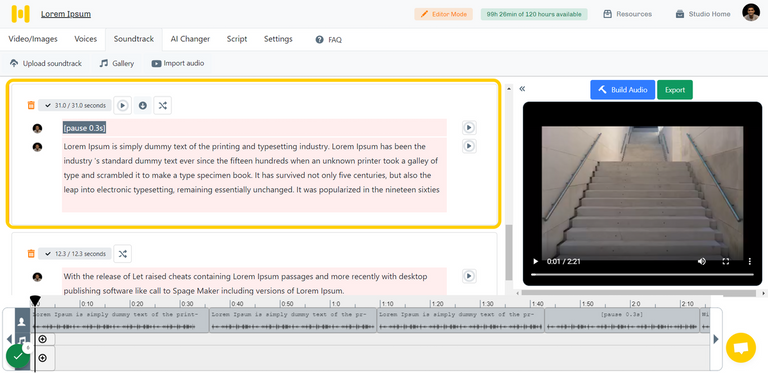
- Click on the audio file on the bottom timeline to transcribe the audio file into a written script.
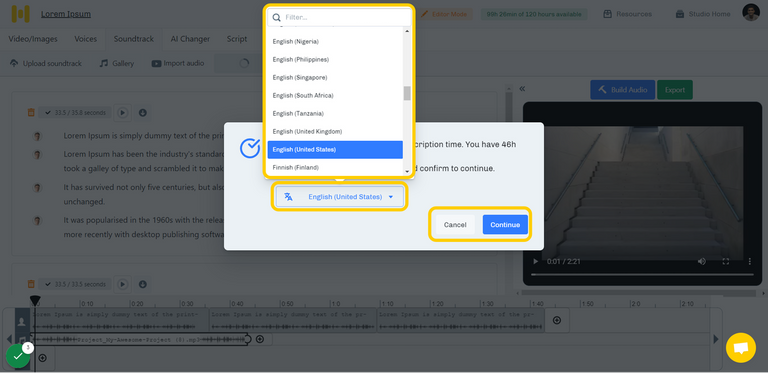
- It will take some time for the Studio to transcribe the video file into a script. Your transcription usage details will appear in the popup window.
- The audio file can be transcribed by using either the 'Transcribe' button in the top toolbar or by right-clicking the audio file from the bottom timeline and selecting 'Transcribe.'
- Kindly select the respective language from the list, the same as the language spoken in the audio file.
- The Studio will now generate text from the speech and display it in the text blocks in your workspace.
Edit the transcribed audio?
The Studio lets you edit your voice-over just by editing the transcribed text. Once the uploaded voice over has been transcribed and the relevant edits have been made, the following changes to the audio can be made.
Mute Audio
The words in the speech can be muted without changing the duration of the voiceover using this function. The muted section is replaced with a pause. Here's how you can do it :
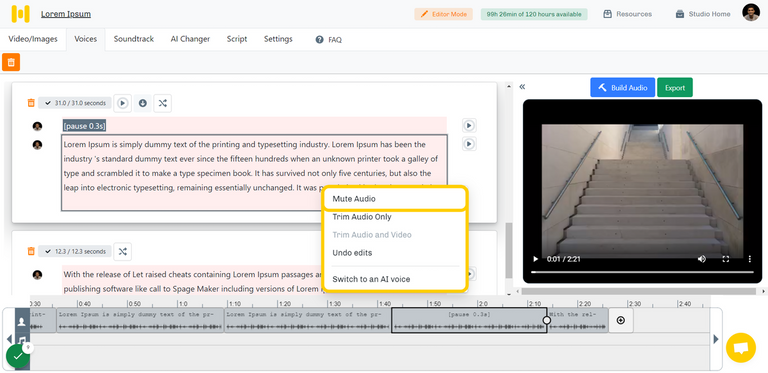
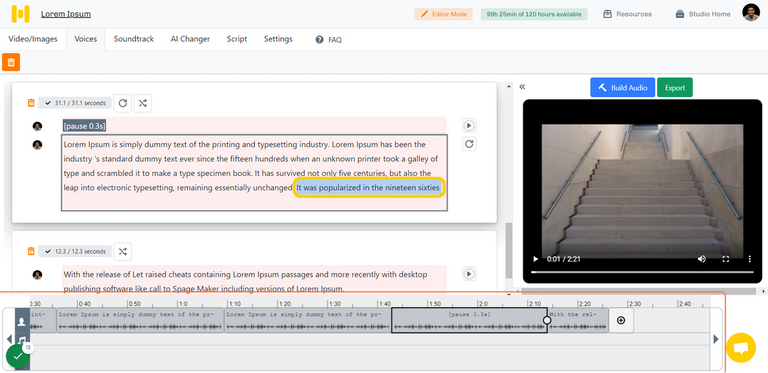
- The transcribed audio will be displayed as text in the workspace. Select the word that you want to mute.
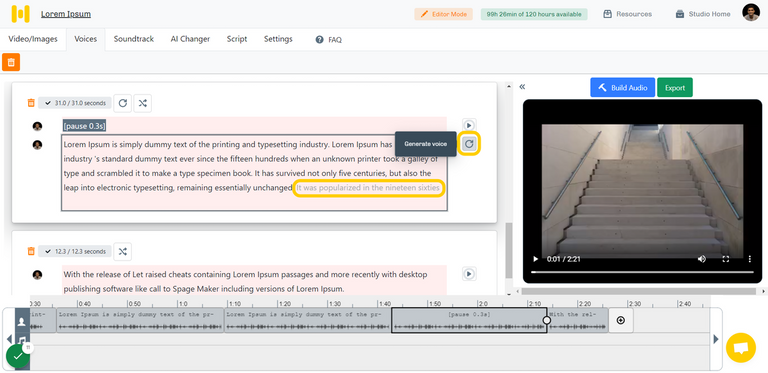
- Right-click on it and select 'Mute Audio'. This will make the word appear transparent in the text block.
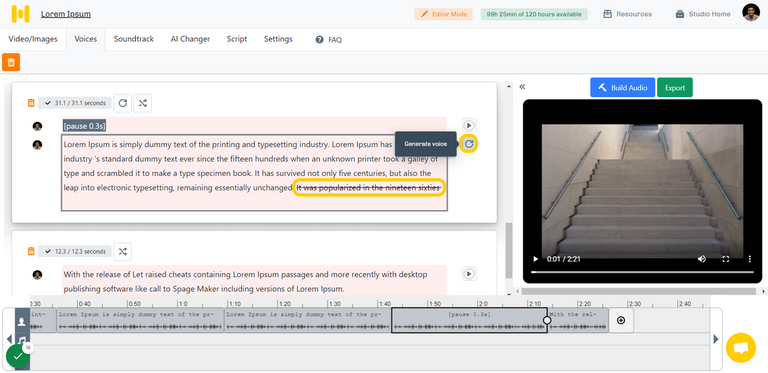
- Now click on the circular arrow to generate audio, and the word will be muted in the audio.
Trim Audio
Trimming the audio will mute the words in the speech and cut the duration of the voiceover relatively. Here's how you do it:
- The transcribed audio will be displayed as text in the workspace. Select the word or phrase that you want to trim.
- Right-click on it and select 'Trim Audio only'. The words will be stricken out in the text block and trimmed in the audio.
Note: The mute and trim audio can be undone by right-clicking on those words and selecting' Undo trims'.
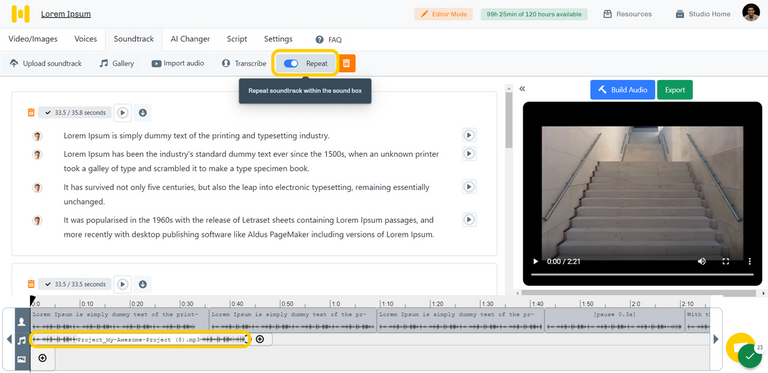
Repeat
The Studio can repeat the soundtrack within the text block. In other words, the soundtrack can be played in a loop. This will be useful in instances where the duration of the text block exceeds the duration of the soundtrack.
