Project Settings 1.0
Loudness
The Loudness setting helps control the voice-over and background music volume.
Difference between Loudness and Volume
The Volume setting in the Voices tab allows the volume of the selected text block to increase or decrease.
However, Loudness helps control the volume of the AI voice-over and the background music for the entire Project. The change in the Loudness menu will apply to all existing and/or new text blocks in the Project.
Let’s see how to use this feature.
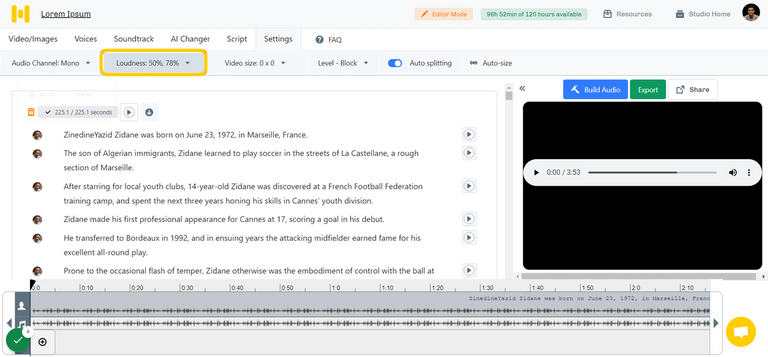
- Head to the 'Settings' tab in the studio and click on the 'Loudness' button.
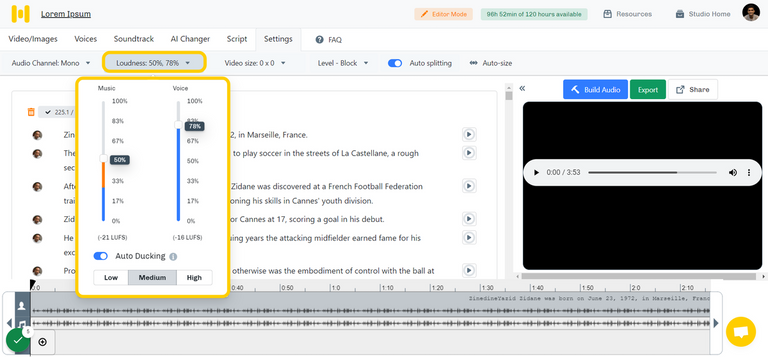
- The menu presents two separate volume scales for 'Music' and 'Voice'.
- The Loudness of both Music and Voice can be altered separately by using the sliders present.
Auto Ducking
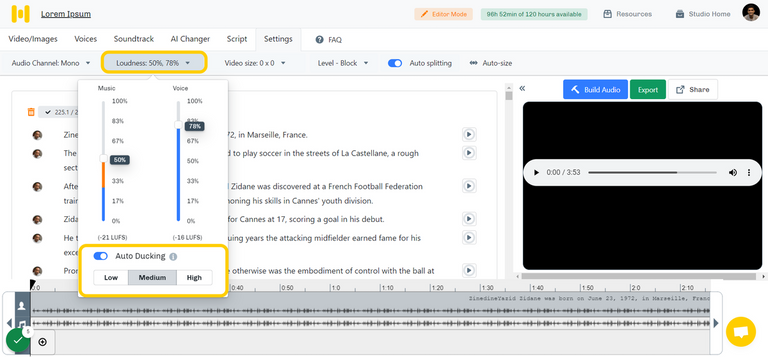
With the auto-ducking option enabled, the Loudness of background music gets automatically lowered when the system detects a voice-over being played simultaneously.
There are three levels available for Auto Ducking:
- Low
- Medium
- High
The blue indicator(Music) corresponds to the Loudness of the music when the voice-over is being played.
The orange corresponds to the Loudness of music when the voice-over isn't playing.
Note:
- Range for each scale is 0% - 100%. 0% will Mute the volume and 100% will generate the highest volume.
- LUFS references Loudness Units to full scale (i.e., the maximum level a system can handle)
Video Size
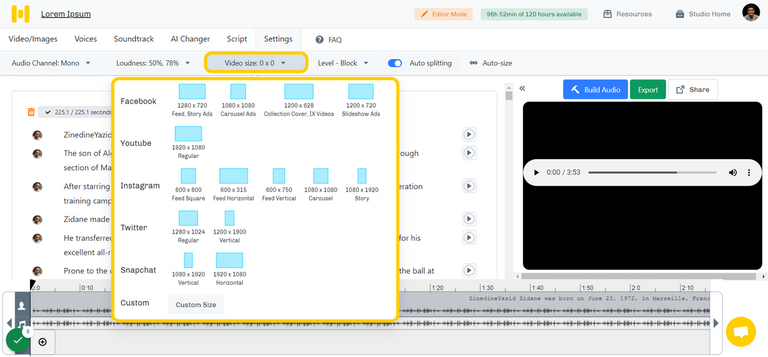
To ensure that the videos are viewed with impeccable resolution each time, we have compiled a range of video sizes in which the video can be exported.
Feed, Story Ads
Recommended size: 1280 by 720 pixels
Pro Tip: Videos can be as long as 240 minutes, as large as 4GB, and have a maximum frame rate of 30fps.
Carousel Ads
Recommended size: 1080 by 1080 pixels
Pro Tip: It supports.MP4 or.MOV format. Videos cannot exceed 240 minutes in length, the maximum frame rate allowable is 30fps, and the maximum file size is 4GB.
Collection Cover, IX Videos
Recommended size: 1200 by 628 pixels
Pro Tip: Collections are a new ad type designed for mobile users. It helps them discover, browse and buy products and services from their phones. It supports .MP4 or .MOV format, maximum file size 4GB, maximum length 120 min, maximum frame rate 30fps.
Slideshow Ads
Recommended size: 1200 by 720 pixels
Pro Tip: Slideshows are designed to accommodate users with slow internet access. It supports .MP4 or .MOV format, maximum file size 4GB, maximum length 120 min, maximum frame rate 30fps.
Youtube
Recommended size: 1920 by 1080 pixels (1080p)
Pro Tip: Minimum size: 426 by 240 pixels and Maximum size: 3840 by 2160 pixels. Maximum file size 128GB, maximum 12 hours long.
Instagram supports square, vertical and horizontal video.
Feed Square
Default Square video size: 600 by 600 pixels.
Pro Tip:
- The maximum file size is 4GB.
- The maximum length is 60 seconds.
- The maximum frame rate is 30fps.
Feed Horizontal
Default Square video size: 600 by 315 pixels
Pro Tip:
- The maximum file size is 4GB.
- The maximum length is 60 seconds.
- The maximum frame rate is 30fps.
Feed Vertical
Default Square video size: 600 by 750 pixels
Pro Tip:
- The maximum file size is 4GB.
- The maximum length is 60 seconds.
- The maximum frame rate is 30fps.
Carrousel
Recommended size: 1080 by 1080 pixels
Pro Tip: Like Facebook carousels, Instagram allows showing anywhere from 2 to 10 images or videos in one side-scrolling ad. This allows marketers to get creative with different media formats and boost engagement. Maximum length 60 seconds, maximum frame rate 30fps.
Story
Recommended size: 1080 by 1920 pixels
Pro Tip: Maximum length 15 seconds, maximum file size 4GB.
Twitter videos are naturally optimised for mobile device-captured video as a mobile-first platform.
Regular
Recommended size: 1280 by 1024 pixels
Pro Tip: Minimum size: 32 by 32 pixels and Maximum size: 1920 by 1200 pixels.
Vertical
Recommended size: 1200 by 1900 pixels
Pro Tip: The maximum file size is 512MB with a maximum frame rate of 40fps.
Minimum size: 32 by 32 pixels,
Recommended size at 256K bitrate: 240 by 240 pixels
Recommended size at 768K bitrate: 480 by 480 pixels
Recommended size at 2048K bitrate: 640 by 640 pixels
Snapchat
Vertical
Recommended size: 1080 by 1920 pixels
Pro Tip: Videos can be between 3 and 10 seconds long, with a maximum file size of 32MB.
Horizontal
Recommended size: Recommended size: 1920 by 1080 pixels
Pro Note: Videos can be between 3 and 10 seconds long, with a maximum file size of 32MB.
Custom Size
Suppose the video is to be of exact width and height; the 'Custom Size' option can be used to choose the resolution of the video output. Once the width and height values have been entered and saved, they can be downloaded in the exact resolution.
Level
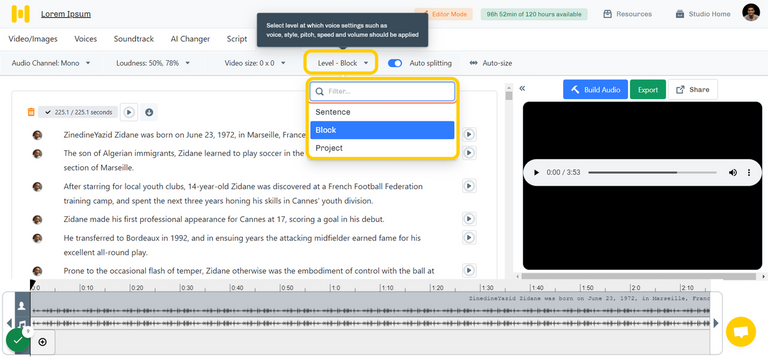
The 'Level' setting controls the level at which changes are made to the Project
Changes such as:
- Voice actor
- Speed
- Pitch
- Volume
The Level setting can be changed in three simple steps:
- Go to the' Settings' tab, and change the Level to 'Sentence'.
- Select the sentence and change the voice in the 'Voices' tab. The voice will be changed only for the sentence that was selected.
- To change the voice for the text block with multiple sentences, change the Level to 'Block' and then change the voice. Now the voice for that entire block will be changed.
Block Level
By default, the Level is set to Block Level. Any changes made to the Project will be applied to the select block.
Sentence Level
To make changes at a sentence level, change the sentence level to sentence.
For example, Sentence Level can be used to create a dialogue/conversational script between 2 or more voices.
Project Level
When the Level is set to Project, the changes will be applied to the entire Project.
This setting can be used to add the same voice actor, speed or pitch to the entire Project.
Note- The settings applied at the project level don't hold good for the new text boxes created after the project level settings were applied.
Auto Splitting
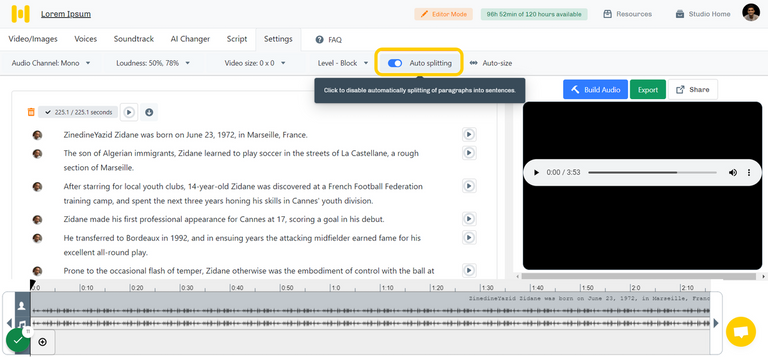
The Auto splitting feature helps split the copied text into sentences when pasting in the Studio. Splitting paragraphs into sentences enable sentence-level settings such as Emphasis, attributing different voices to each sentence, etc.
Script Upload: Auto splitting Disabled
Each paragraph is fit into a sentence block/sub-block. Each text block/block has a limit of 10 sentence blocks; when the number of paragraphs exceeds that, the rest of the paragraphs are populated in a new block. Each text block has a limit of 1000 words.
Script Upload: Auto splitting Enabled
The paragraphs are split into sentences, with precisely 10 sentence blocks in a text block. This ensures that the number of characters is well within the 1000-character limit set for the text block.
Note: Enabling Auto splitting after typing or pasting the paragraph will not split it into sentences. Paragraphs are only split after enabling this feature.
Script Paste: Auto splitting Disabled
Multiple paragraphs can be pasted inside a text block as long as the character limit of 1000 is not crossed. Otherwise, a warning will be prompted to create another text block, and any word after the limit will be cut off.
Script Paste: Auto splitting Enabled
Enabling auto splitting and pasting the script functions similarly to script upload with auto splitting.
Note: Auto splitting is essential because Emphasis cannot be applied to the script without it.
Auto-Size
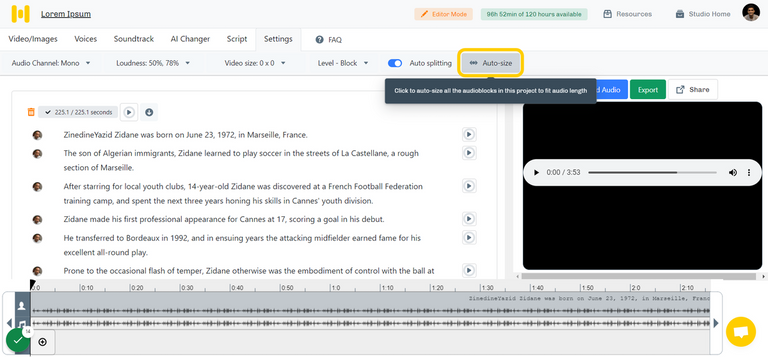
The duration of the text blocks can sometimes be more than the duration of the generated voice, resulting in pauses. To make the block fit the audio length, click on the "Auto-size" option.
Here, the audio duration is much shorter than the duration of the text block. This can happen in 4 cases:
- When sub-blocks or sentences are deleted.
- When the block's duration has been manually increased from the bottom timeline.
- Increase in the speed of the audio
- And sometimes, when the voice is changed
To trim it to fit the audio, click on the "Auto-size" option in the "Settings" bar. Autosizing can be done at the block level by double-clicking the resizing slider(circular button to the right of the highlighted block in the timeline). We can see now that the block has been made to fit the length of the voice.
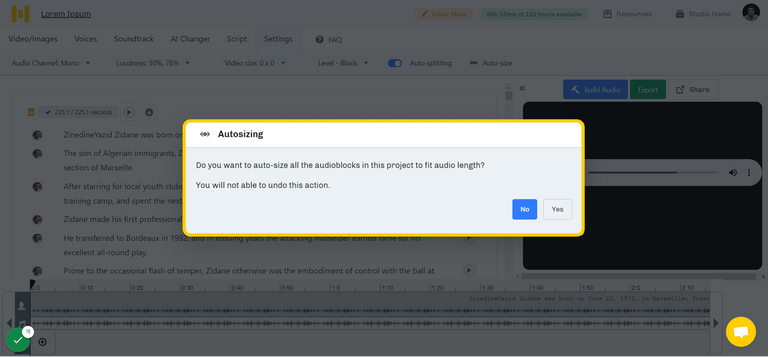
To do the same at the project level, click on "Auto size" on the settings bar and click on "Yes" to auto-size all the audio blocks in the Project.
